English
  Blog Game Guide Neverness to Everness Sakiri Build Guide: Best Builds, Teams, Arcs & Gameplay
Sakiri is one of the strongest support characters in Neverness to Everness, offering powerful crowd control, team-wide ATK buffs, and the ability to fit into almost any team composition. As an S-Rank Incantation support, her gameplay revolves around grouping enemies, locking them in place, and enabling your DPS to deal massive damage during buff windows. This makes Sakiri a top-tier pick for both beginners and endgame players, especially in content where controlling enemies and maximizing burst damage is key.
Table of Contents

In this Neverness to Everness Sakiri build guide, we’ll cover her full kit, best builds, arcs, modules, teams, and pull advice to help you maximize her value in any team. To get the most out of Sakiri, consistent gameplay and efficient farming are important, especially when building her stats and optimizing her rotations. With OSLink, you can run multiple game sessions to reroll for Sakiri early or Play your Neverness to Everness PC session remotely from your phone, making it easier to farm, test teams, and improve your Sakiri gameplay anytime.
Neverness to Everness Sakiri: Character Overview
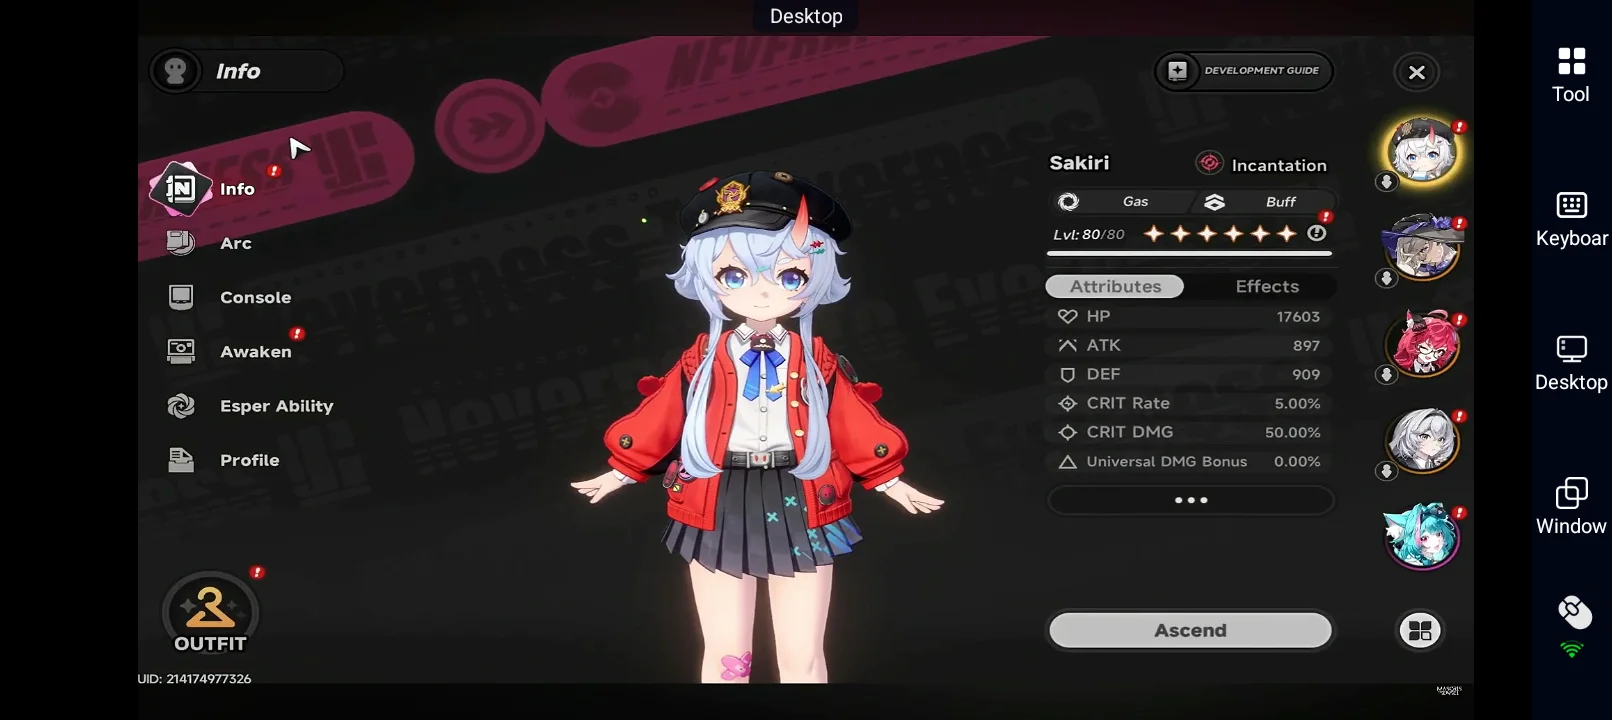
Sakiri is an S-Rank Incantation support in Neverness to Everness who specializes in crowd control and team-wide damage amplification. Instead of dealing damage herself, she focuses on grouping enemies, locking them in place, and boosting your team’s ATK, making it much easier for your DPS characters to deal massive burst damage.
-
Role: Support / Crowd Control / Team Buffer
-
Element: Incantation
-
Specialty: Enemy grouping, ATK buffs, and battlefield control
-
Strength: Enables DPS burst windows and improves team consistency
Sakiri’s gameplay is simple but extremely effective. She pulls enemies together using her skills, applies strong buffs through her Ultimate, and then allows your main DPS to take advantage of the setup. This makes her one of the most flexible support characters in the game, as she works well with almost any DPS that scales with ATK.
However, Sakiri relies heavily on her Ultimate to provide her strongest buffs, meaning she requires good Charge Efficiency and proper timing to maintain her impact. When used correctly, she becomes one of the best support options in the game, turning difficult fights into controlled and manageable encounters.
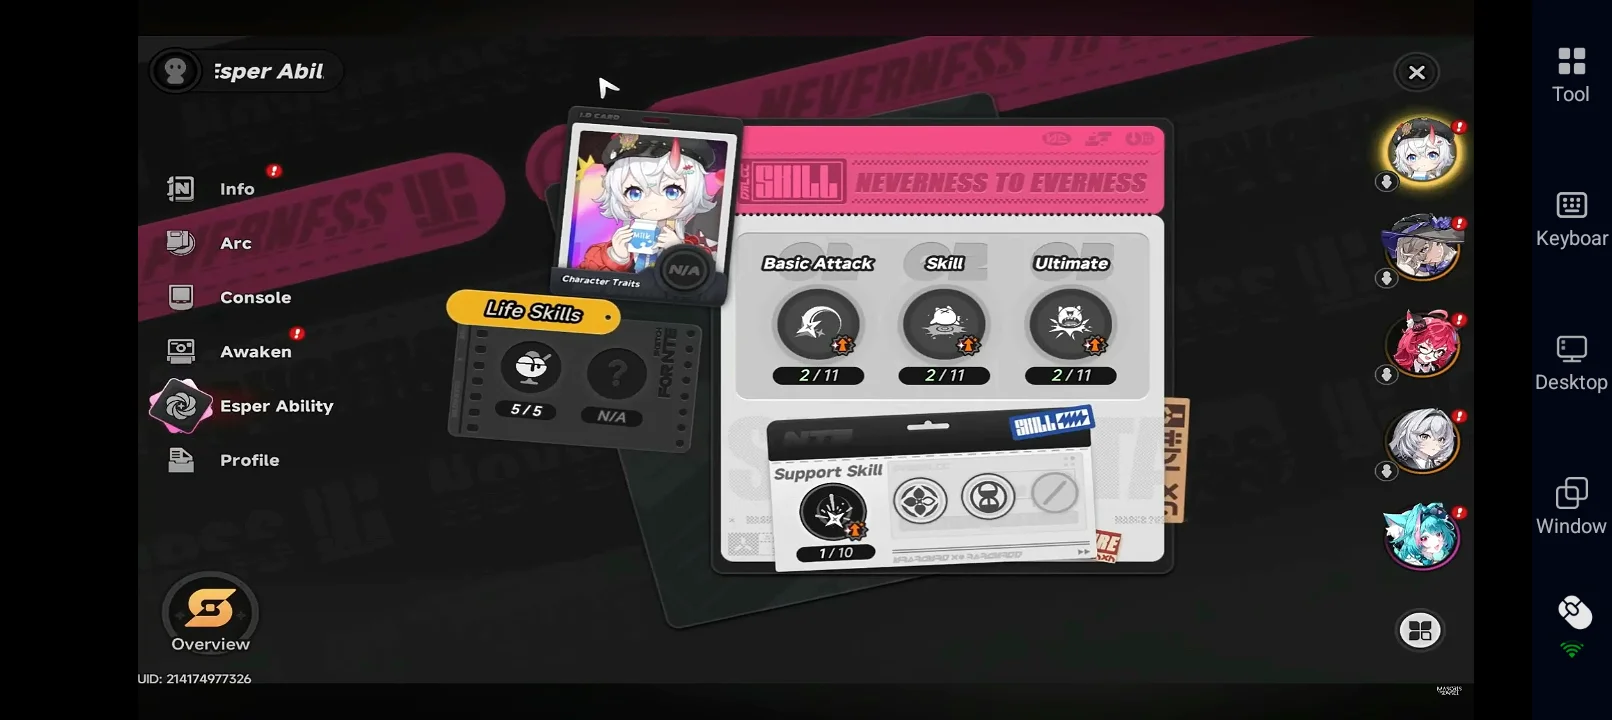
Sakiri Skill Breakdown
Sakiri’s kit is built around grouping enemies, controlling their movement, and amplifying your team’s damage. Instead of dealing damage herself, she sets up the battlefield so your DPS can hit multiple enemies at once and take full advantage of her buffs. Her gameplay is straightforward, but timing her abilities correctly makes a big difference in overall team performance.
Basic Attack – Kiroumaru Headbutt / Ram
Sakiri performs a series of hammer attacks dealing Incantation damage. While her basic attacks are simple, they play an important role in maintaining pressure and helping generate energy between rotations.
Holding the Basic Attack activates Eating Mode, one of her most useful tools for crowd control:
-
Pulls enemies in a cone-shaped area
-
Allows Sakiri to move while dragging enemies
-
Can instantly devour weaker enemies
This makes Eating Mode a strong setup tool for grouping enemies before using her Skill or Ultimate.
She also has a Plunge Attack (Swallow) that deals AoE damage, which can be used after grouping enemies for better positioning, and a Dodge Counter (Mischief) that helps with additional control and Break damage.
Sakiri Skill – Devour Whole
This is Sakiri’s main crowd control ability and the core of her gameplay.
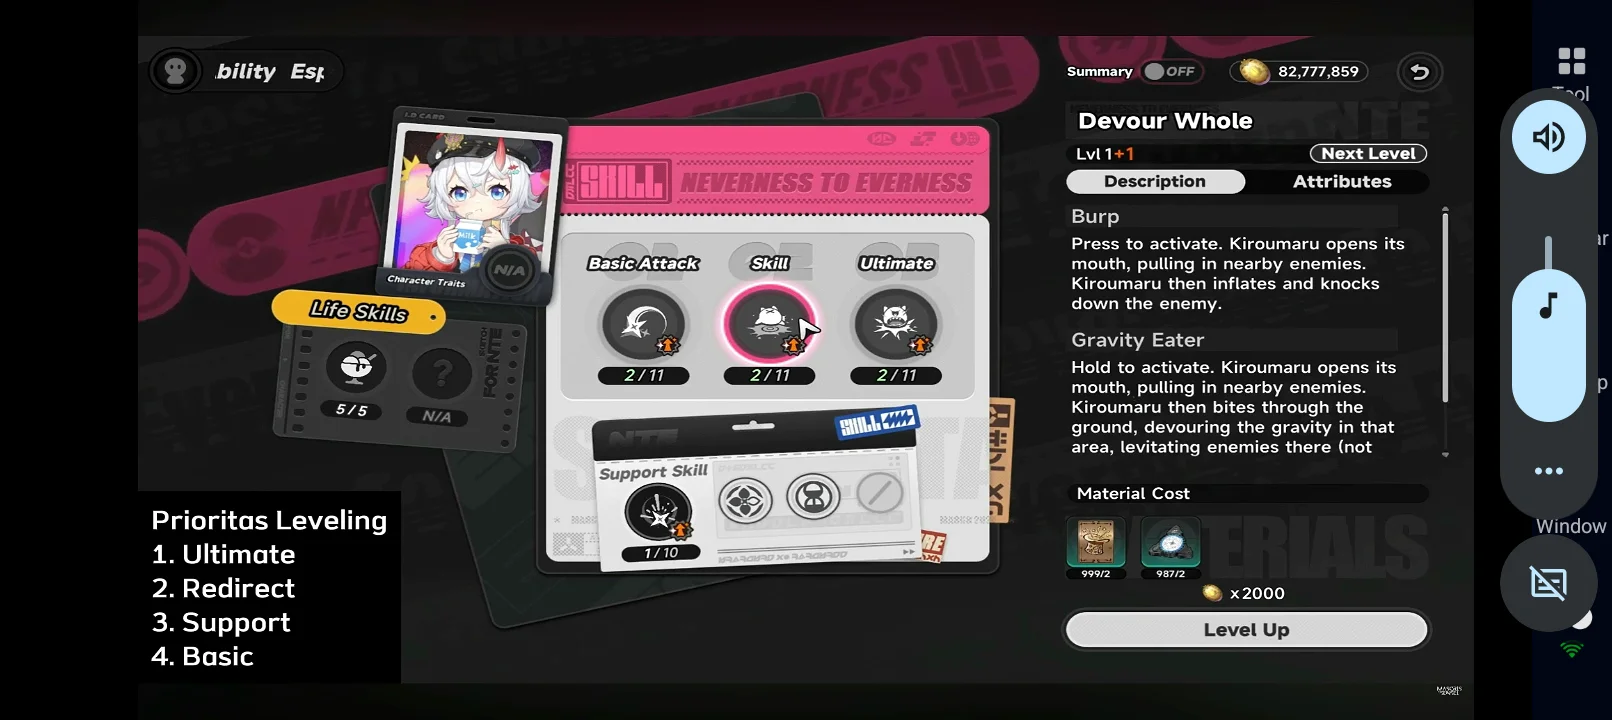
-
Tap (Burp): Quickly pulls nearby enemies together and knocks them down
-
Hold (Gravity Eater): Pulls enemies in and lifts them into the air
The hold version is especially valuable because airborne enemies become easier targets for your DPS and can trigger additional effects like defense reduction. This skill is what allows Sakiri to consistently group enemies and control the flow of combat.
Ultimate – Feast of Gluttony
Sakiri’s Ultimate is the most important part of her kit and the main reason she is considered a top-tier support. When activated:

-
Deals multiple instances of AoE Incantation damage
-
Locks enemies in place, preventing movement
-
Grants a team-wide ATK buff based on Sakiri’s Base ATK
This Ultimate creates a powerful damage window where enemies are controlled and your team deals significantly more damage. It also enhances certain effects like increased damage over time and defense reduction under specific conditions.
Because of this, maintaining high Ultimate uptime is essential for maximizing Sakiri’s value.
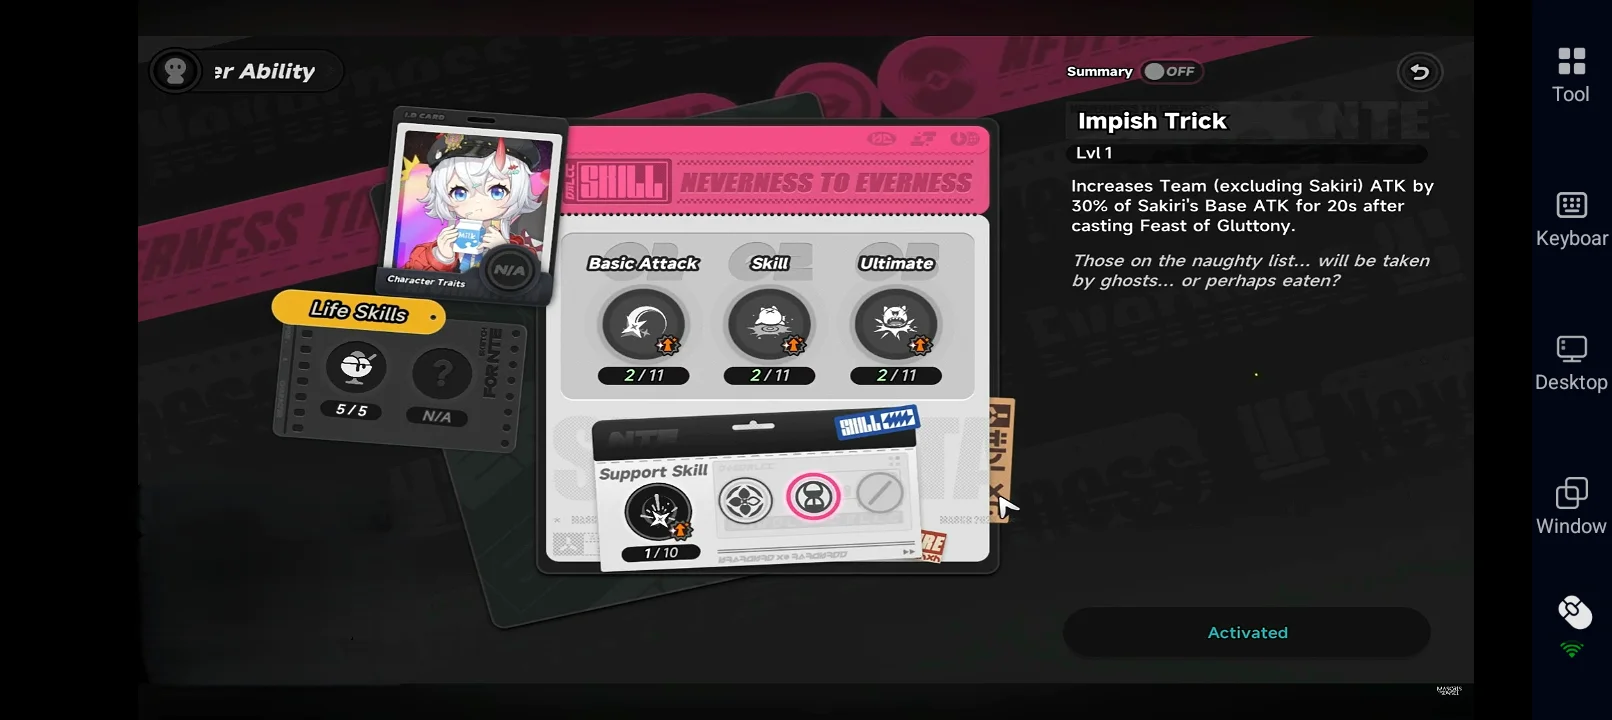
Sakiri Support Skills and Passives
Sakiri’s additional abilities further enhance her role as a support:
-
Squash! (Support Skill): AoE damage and additional crowd control
-
Can I Eat This? (Passive): Increases damage over time effects on enemies
-
Impish Trick (Passive): Boosts team ATK based on Sakiri’s ATK
These passives reinforce her role as a buffer and make her especially strong in teams that rely on DoT or ATK scaling.
Skill Upgrade Priority
To get the best performance from Sakiri:
-
Skill (Devour Whole) – Core crowd control and grouping tool
-
Ultimate (Feast of Gluttony) – Main source of team buffs
-
Basic Attack – Helps with energy generation and utility
-
Support Skills & Passives – Improve overall team value
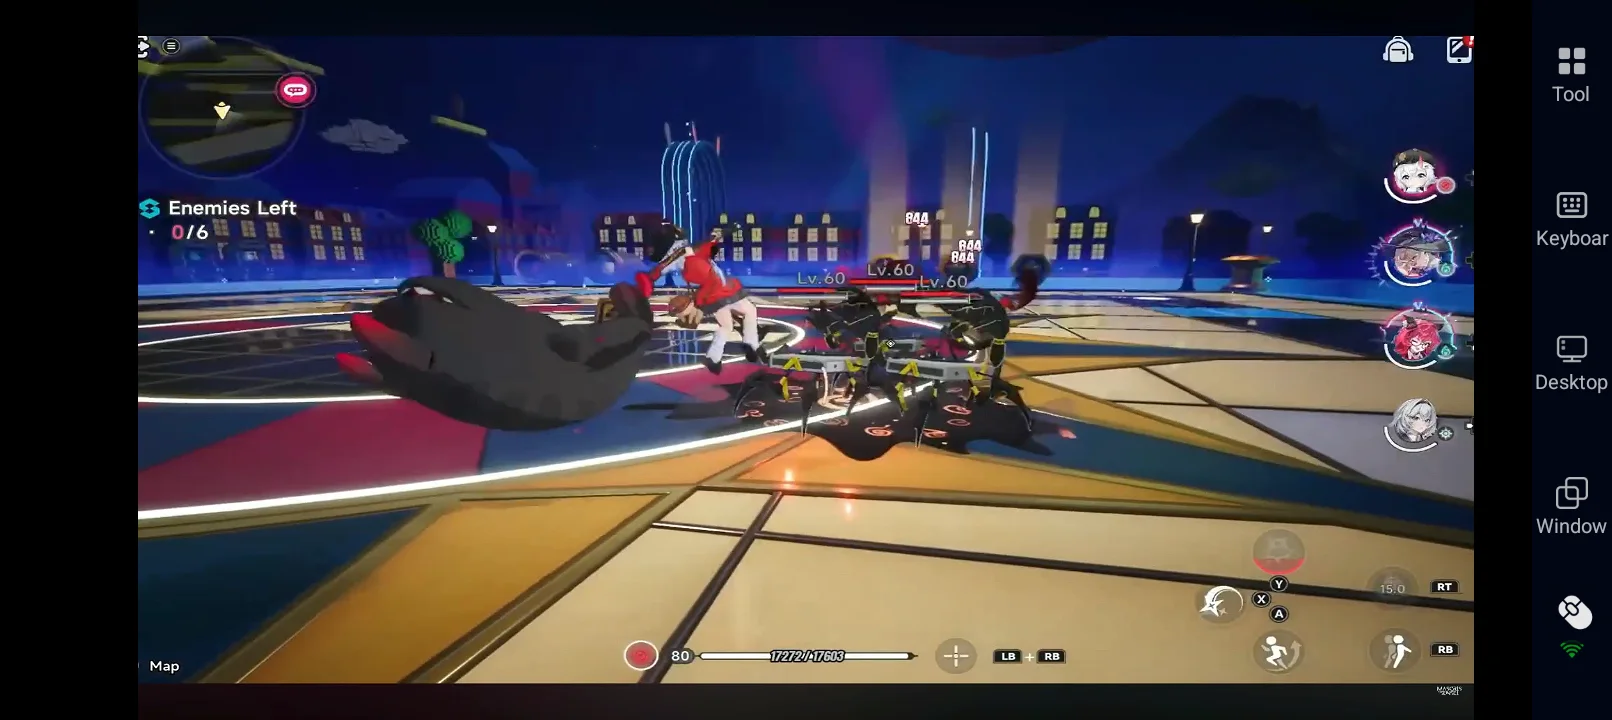
How to Play Sakiri (Simple Rotation)
Once you understand her kit, Sakiri’s gameplay is very simple and consistent.
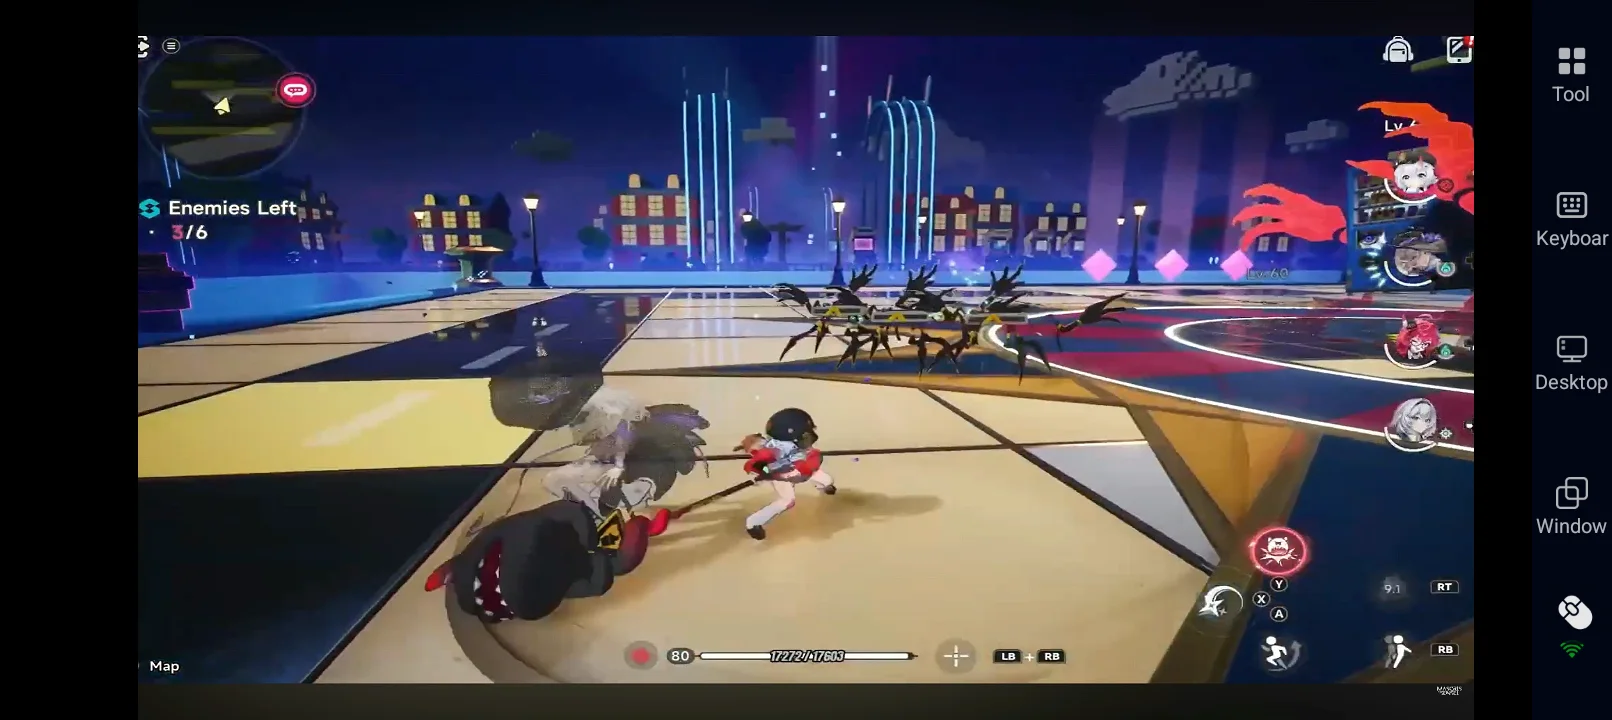
-
Use Skill to group enemies together
-
Use Ultimate to apply buffs and lock enemies in place
-
Swap to your main DPS and deal damage during the buff window
-
Return to Sakiri between rotations to rebuild energy and repeat
The key to maximizing Sakiri’s gameplay is timing her Ultimate before your DPS burst. Since her buffs last for a limited time, using your DPS immediately after her Ultimate ensures you get the full benefit.
Sakiri Awakenings and Resonance
Sakiri’s Awakenings focus on improving her crowd control uptime, energy consistency, and team-wide buffs. Since her role is to enable DPS rather than deal damage herself, the most valuable upgrades are the ones that increase her buff strength and Ultimate frequency.
|
Awakening |
Effect |
Why It Matters |
|
A1 – Diffusive Haze
|
Extends Ultimate immobilize duration to 6s |
Stronger control window. Keeps enemies locked longer, giving your DPS more time to deal damage safely. |
|
A2 – Dextrous Separation
|
Deals extra damage to airborne enemies (up to 600% ATK) |
Situational damage boost. Works well with her hold Skill, but less important since she is not a DPS. |
|
A3 – Adhesive Grip
|
Gains up to 60% more damage on Skill & Ultimate after team kills |
Minor damage increase. Useful in mob content, but not a priority for support-focused builds. |
|
A4 – Wishful Reliance
|
After Ultimate, grants 30% of Sakiri’s Base ATK as team ATK (20s) |
Biggest power spike. Greatly increases team damage and defines her value as a buffer. |
|
A5 – Sensory Collapse
|
Using Skill on airborne enemies fully resets Ultimate |
Huge utility boost. Enables faster Ultimate uptime and smoother rotations in fights with multiple enemies. |
|
A6 – Gluttonous Dissolution
|
Eating Mode can digest up to 3 enemies at once |
Quality-of-life upgrade. Improves crowd control efficiency, especially in large enemy groups. |


Awakening Priority:
For most players, focus on:
👉 A4 → A5 → A1 → A6 → A2 → A3
-
A4 is the most important, massively boosting team damage
-
A5 improves rotation consistency by enabling more frequent Ultimates
-
A1 enhances control duration for safer and stronger DPS windows
-
The rest are useful but less impactful for her core support role

 AFK Anywhere, Progress Anytime

Sakiri Resonances
|
Resonance |
Effect |
Why It Matters |
|
Insatiable Appetite (3 Awakenings) |
+1 level to Basic Attack, Skill, and Ultimate |
Small overall boost. Improves scaling across her kit but not game-changing. |
|
Fog Penetration (6 Awakenings) |
Deals up to 12% more damage based on enemy debuffs |
Extra team damage. Works well in debuff-heavy teams, but still secondary to her buff role. |
Sakiri Best Arcs (Weapons)
When building Sakiri, your Arc choice should focus on increasing her Base ATK and Charge Efficiency, since both directly impact her team buffs and how often she can use her Ultimate. Unlike DPS characters, Sakiri does not need damage-focused weapons, her value comes from enabling the team, not dealing damage herself.
|
Arc |
Effect |
Why It Matters |
|
Good Boy’s Grand Adventure (Signature Arc)
|
Provides high ATK and Charge Efficiency. Grants additional team ATK when Sakiri uses her Ultimate and controls enemies |
Best-in-slot. Maximizes her buff strength and helps her use Ultimate more often, making it the strongest option for support builds. |
|
Tears Beneath the Mask (Alternative Arc)
|
Offers high base ATK and applies damage reduction effects on enemies |
Defensive option. Improves team survivability while still supporting Sakiri’s ATK scaling. |
|
Cosmos Daze / Wild Reverie (Budget Options)
|
Provide ATK and minor utility effects |
Beginner-friendly. Usable early on, but weaker compared to higher-tier Arcs. |


Recommended Sakiri Cartridge / Modules
For Sakiri, your gear setup should focus on maximizing her team buffs and Ultimate uptime rather than personal damage. Since her ATK directly increases the team’s ATK buff and her Ultimate is her most important ability, building the right stats is essential for getting full value from her.
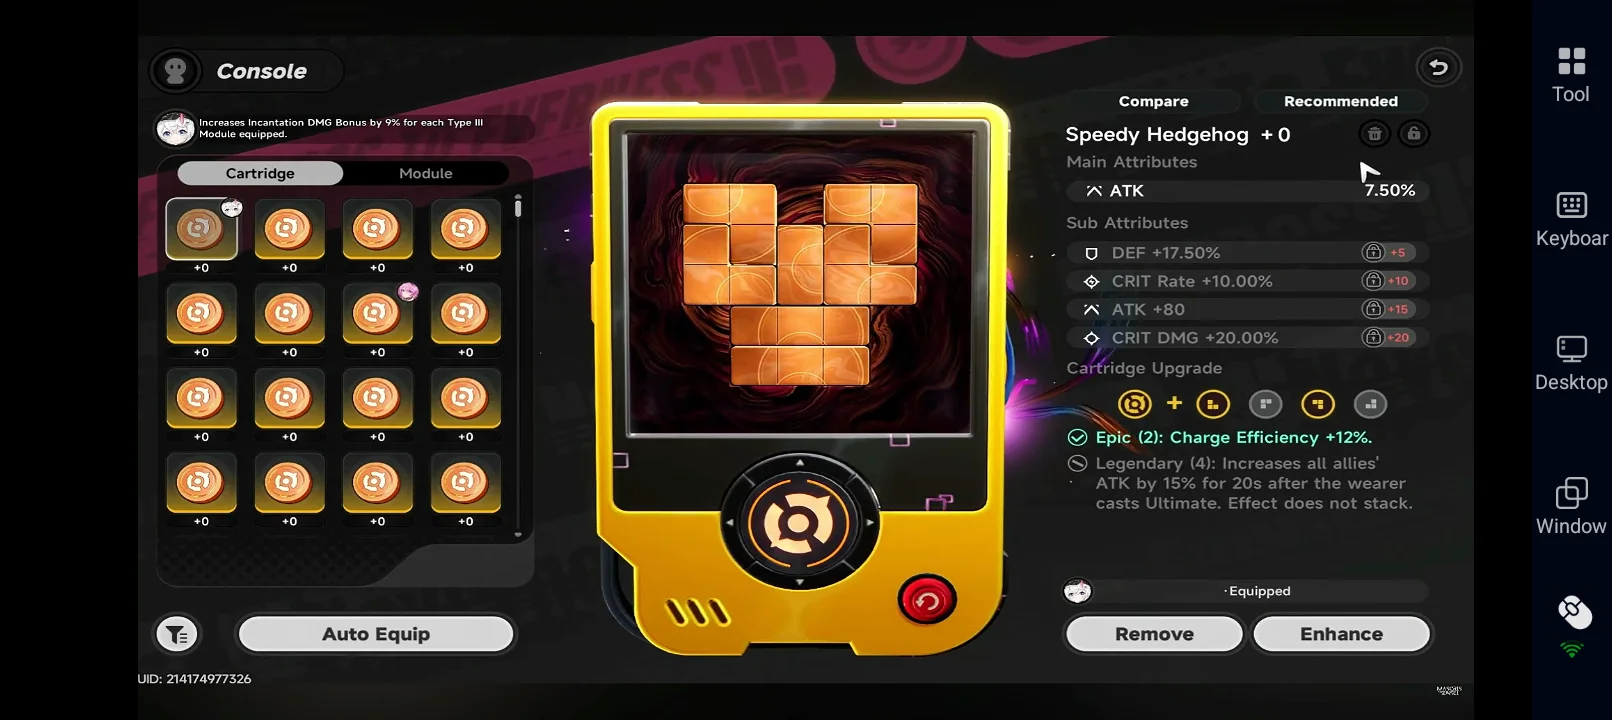
Best Cartridge Setup
|
Cartridge |
Effect |
Why It Matters |
|
Speedy Hedgehog
|
Increases Charge Efficiency and boosts team ATK after using Ultimate |
Best choice. Improves Ultimate uptime while also increasing the strength of her team buffs, making it perfect for support builds. |

2-Piece Bonus: +12% Charge Efficiency
4-Piece Bonus: Increases all allies’ ATK after Ultimate by 15% for 20s
Recommended Stats for Module Setup
To optimize Sakiri’s performance:
-
Main Stats: ATK% → Incantation DMG → Cycle Intensity
-
Substats Priority: ATK% → ATK → Universal DMG Bonus → Cycle Intensity
Recommended Teams for Sakiri
Sakiri is a strong support character who groups enemies and boosts the whole team’s damage, so the best Sakiri teams are built around strong DPS units and reaction support.
below are the best teams you can build around Sakiri:
AoE Clear Team
This is Sakiri’s best team for farming, story stages, and general PvE content. The team focuses on strong enemy grouping, consistent AoE pressure, and smooth reaction-based combat that allows enemies to be cleared quickly with minimal downtime. Sakiri’s crowd control and team buffs help the entire team deal stable damage while keeping rotations simple and efficient.
|
Character |
Role |
Why They Work Well |
|
Sakiri
|
Support / Crowd Control |
Sakiri controls the battlefield through grouping, suppression, and gravity effects that keep enemies clustered together for easier AoE damage. Her Ultimate also provides strong team-wide ATK buffs, allowing the entire team to deal more consistent damage during rotations. |
|
Nanally
|
Main DPS |
Nanally acts as the primary damage dealer, taking advantage of grouped enemies to trigger powerful Covering Pattern reactions and deal large amounts of sustained AoE damage. She performs especially well in farming content where enemies appear in waves. |
|
Zero
|
Sub-DPS |
Zero provides additional Cosmos damage and helps maintain steady pressure during rotations. Sakiri’s grouping and control effects allow Zero to land abilities more consistently, improving overall team damage and reaction uptime. |
|
Jiuyuan
|
Support |
Jiuyuan provides extra utility and crowd control support to help maintain smooth combat flow. Their supportive abilities help stabilize rotations while improving the team’s consistency in longer multi-wave encounters. |


Why this team works:
-
Excellent enemy grouping for easy AoE damage
-
Strong Covering Pattern and Cosmos reaction synergy
-
High sustained damage with simple and forgiving gameplay
-
Perfect for early to mid-game farming and story progression
Boss Support Team
This team is designed for boss fights and difficult endgame content, focusing on Discord reactions, Break pressure, and controlled burst windows. Sakiri supports the team through crowd control and ATK buffs while Baicang and Daffodill handle the majority of the damage output. Haniel further amplifies the team with powerful offensive buffs and coordinated damage effects.
|
Character |
Role |
Why They Work Well |
|
Sakiri
|
Support / Crowd Control |
Sakiri helps create safe damage windows through suppression, grouping, and crowd control effects while also boosting team ATK with her Ultimate. Her utility makes it easier for the team to safely set up burst rotations during difficult fights. |
|
Baicang
|
Main DPS |
Baicang serves as the team’s primary carry, using his Power Word mechanics and Judgment of Autumn to unleash massive burst damage. Sakiri’s control effects and Haniel’s buffs allow him to stay on the field more safely while maximizing his damage output. |
|
Daffodill
|
Break DPS / Sub-DPS |
Daffodill rapidly pressures enemy Break gauges and helps trigger Discord reactions through her Chaos damage. Her Insight mechanic creates powerful burst opportunities that Baicang can capitalize on during stun windows. |
|
Haniel
|
Buffer / Utility Support |
Haniel continuously buffs the team through Hootie and Ensemble effects while adding extra coordinated damage during combat. Her persistent ATK buffs greatly improve the consistency of both Baicang and Daffodill during longer boss fights. |


Why this team works:
-
Strong Discord reaction synergy
-
Excellent crowd control and Break pressure
-
Multiple offensive buffs stacking together
-
Stable burst windows for Baicang and Daffodill
-
Very strong for bosses, elites, and endgame encounters
Conclusion
Sakiri is one of the most valuable support characters in Neverness to Everness, combining strong crowd control, team-wide ATK buffs, and the flexibility to fit into almost any team, making her a powerful enabler for both early and endgame content. To make building and progressing with Sakiri even easier, you can use OSLink to access your PC session remotely or run multiple instances for faster farming and rerolls, helping you optimize your gameplay anytime without being tied to your setup.
 Download