English
Hey Commanders! The newest special bunny-suit variant of the base Sin from the Bunny event in Goddess of Victory: Nikke, Sin: Swift Bunny, has now arrived in the game. This powerful Water DPS brings two unique modes to the battlefield, giving you new ways to approach different battles. And if you are looking for pull advice or want to build her in the best way, this Sin: Swift Bunny build guide has everything you need, including her skills, Harmony Cube, and best team compositions.

While you are focusing on Sin: Swift Bunny building and unlocking her full potential in battle, you’ll need plenty of resources for upgrades and leveling. And that's where OSLink turns everything in your favor. With its unique built-in Auto Clicker feature, you can automate repetitive tasks like daily missions and material farming, making leveling easier while you continue progressing toward the best Sin: Swift Bunny build.
Sin: Swift Bunny Overview
Sin: Swift Bunny is a limited Missilis Burst III Attacker from the 2026 Bunny event in Goddess of Victory: Nikke. She is a flexible Water DPS with AOE capability and having two modes that offer different battle styles. Her default Stance Mode provides strong Critical buffs for consistent damage, while Engage Mode lets her deal True Damage that ignores enemy Defense.

With these dual mode strength, she is considered one of the strongest Water DPS characters and performs exceptionally well in Campaign, Missilis Tower, and bossing or solo raids, especially when paired with right supports that boost True Damage.
Quick Overview:
-
Class: Attacker
-
Burst Type: Burst III
-
Weapon: Sniper Rifle (Blink Carrot) – switches temporarily on Burst
-
Element: Water
-
Manufacturer: Missilis
-
Main Role: Flexible Water DPS (Critical or True Damage)
-
Best Strengths: Mode switching, True Damage option, strong multi-target Burst, self ATK buffs
-
Best Team Types: Water teams, True Damage comps, Critical comps, Bunny pair teams
-
Playstyle: Switch modes with full-charge holds; use Burst for big damage and temporary fast-fire weapon
Sin: Swift Bunny Skill Breakdown
Sin: Swift Bunny’s kit is built around two main Bunny Modes with switching between Stance Mode and Engage Mode. At first, her mode switching may feel a bit complex, but once you understand the flow, she becomes a very strong and flexible DPS unit.
Below is the full breakdown of Sin: Swift Bunny skills:
Skill 1: Bunny Shift
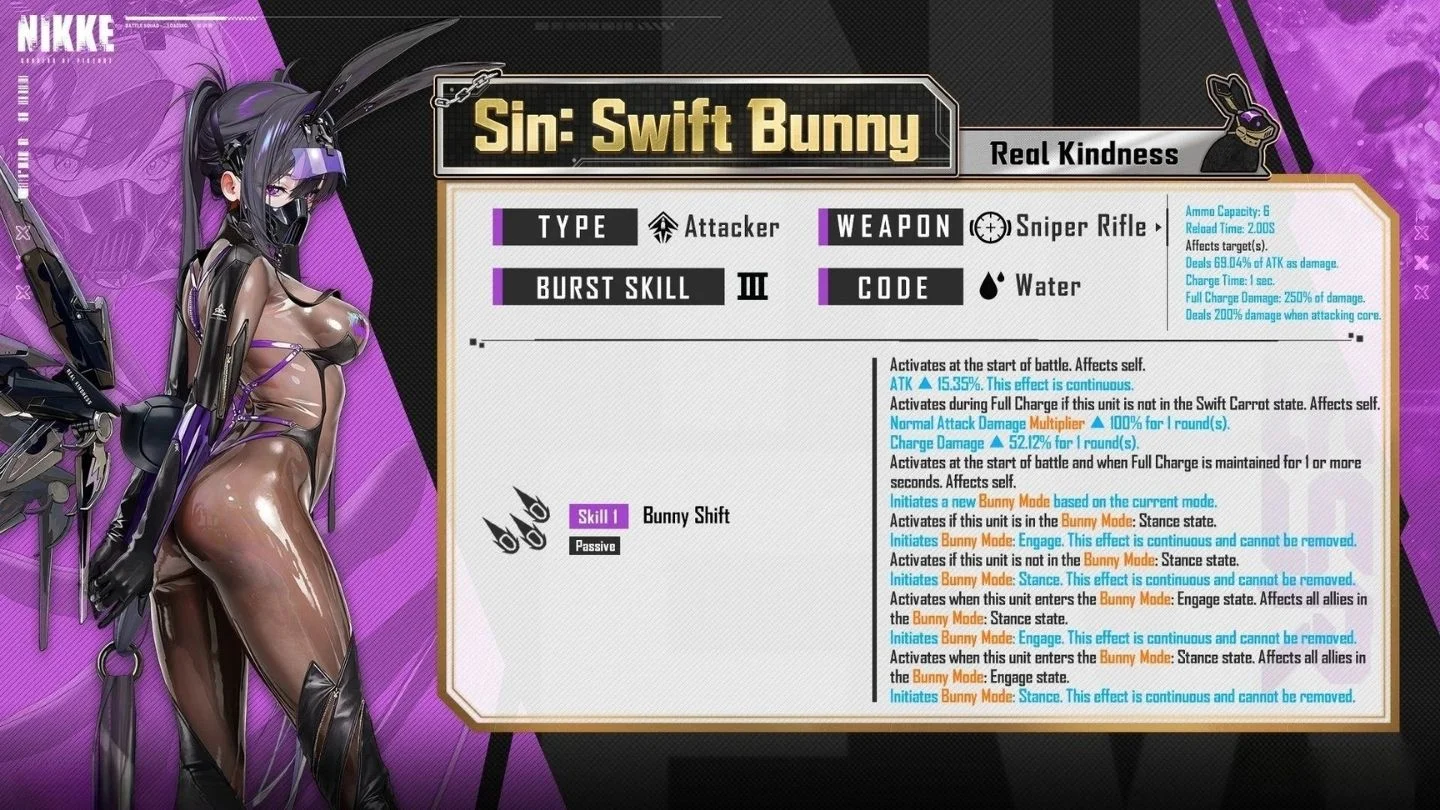
This is the core skill of Sin: Swift Bunny. It activates at the start of battle and when she maintains a full charge, allowing her to switch between Bunny Mode: Stance and Bunny Mode: Engage, when holding a fully charged shot for 1+ second. while providing consistent damage buffs throughout the fight.
-
In Bunny Mode: Stance, Sin gains additional Critical Rate and Critical Damage. Full Charge hits also trigger extra damage multipliers, making this mode suited to conventional charged-shot Crit DPS.
-
In Bunny Mode: Engage, her normal attacks and Swift Carrot deal True Damage instead. Full Charge hits also trigger additional True Damage, making this mode useful against enemies with high DEF.
Skill 2: Bullet Switch
This passive skill activates based on her current Bunny Mode and plays a key role in keeping her strong in both damage types.
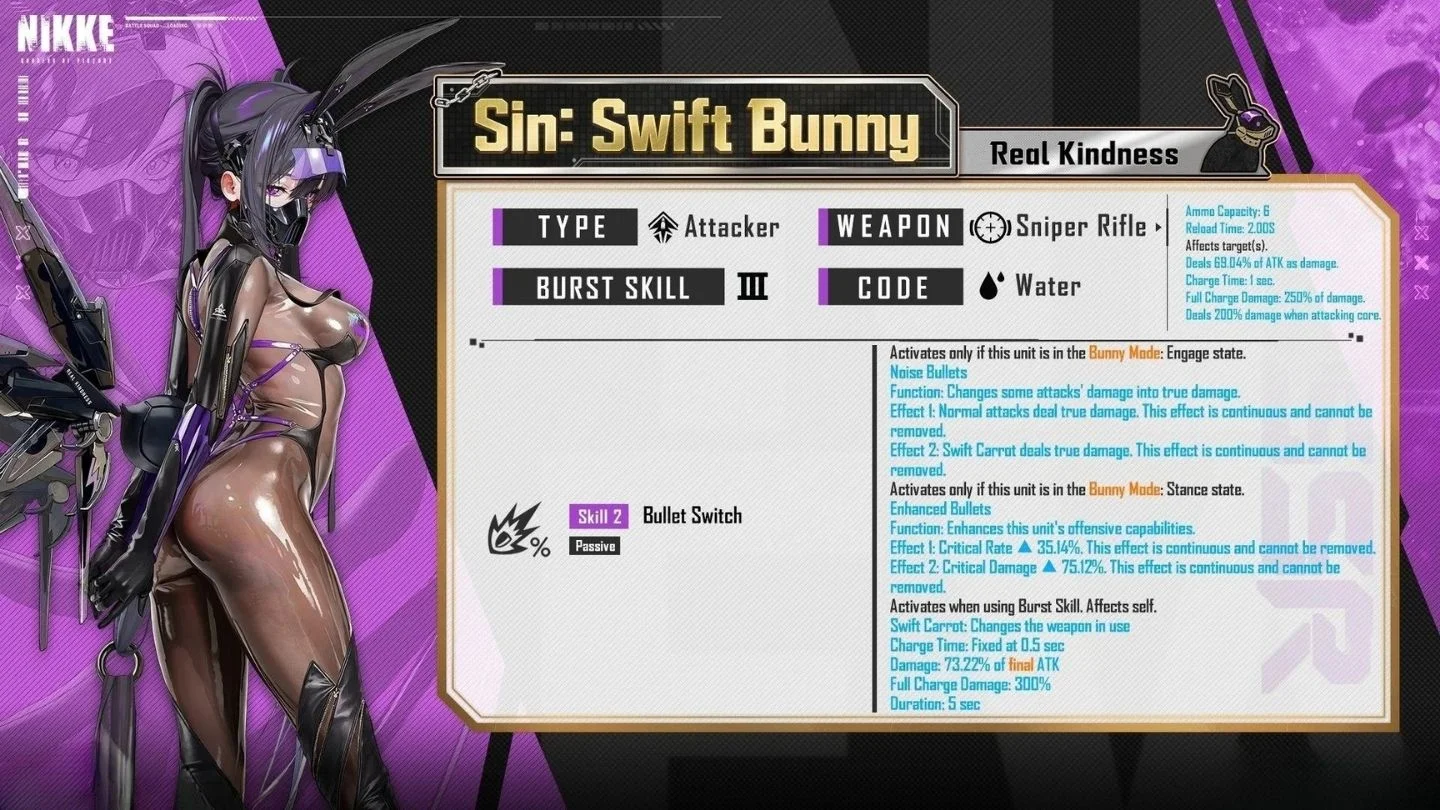
When this skill is activated:
-
In Engage Mode (Noise Bullets): Normal attacks and Swift Carrot deal True Damage (defense-ignoring). Continuous and cannot be removed.
-
In Stance Mode (Enhanced Bullets): Boosts Critical Rate and Critical Damage buffs.
-
On Burst Skill use: Changes weapon to Swift Carrot for a short duration with fixed reduced charge time, higher damage, and increased full charge multiplier.
Burst Skill: Swift Piercing
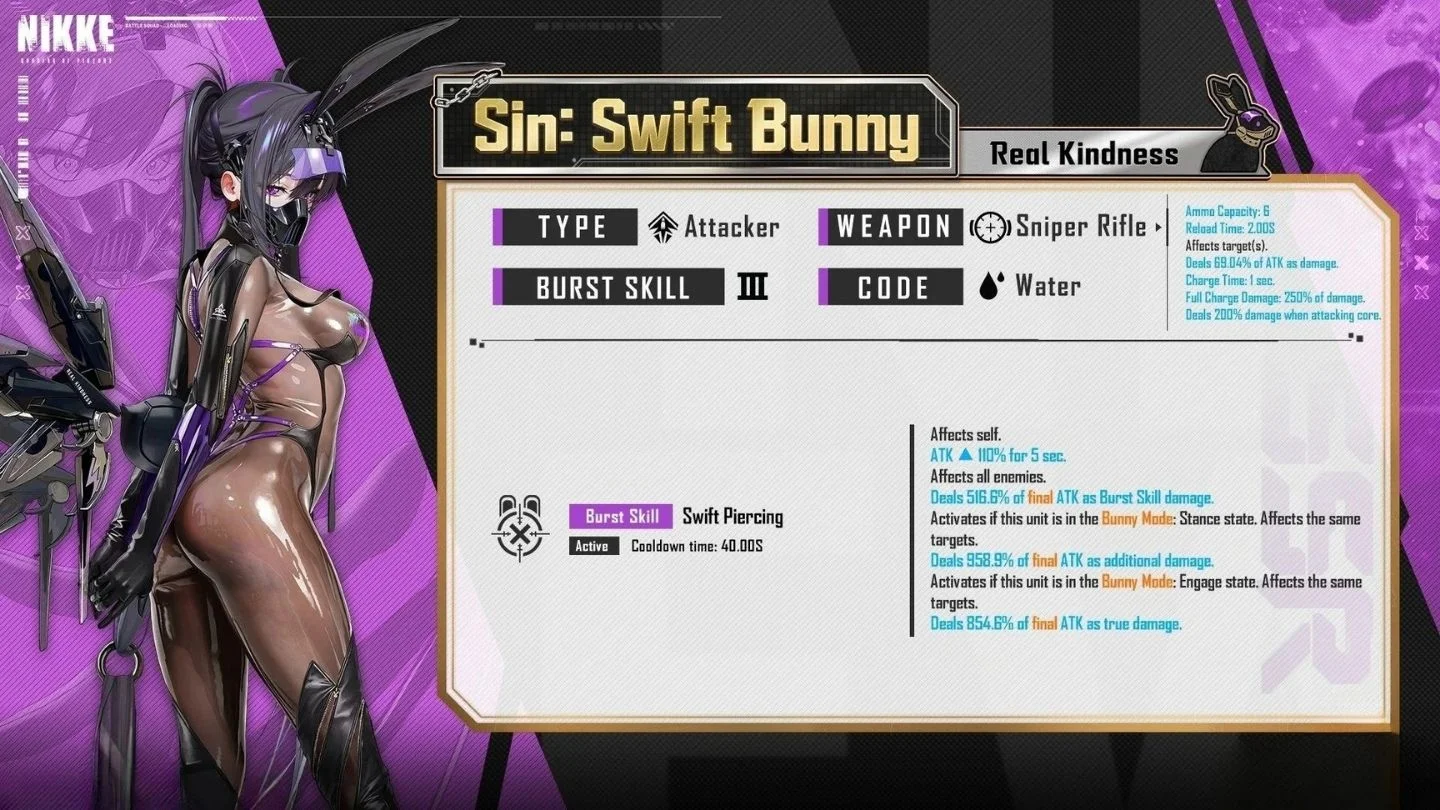
This is Sin: Swift Bunny’s main Burst Skill with a 40-second cooldown, providing both strong self-buffs and high multi-target damage. When this Burst Skill is activated:
-
Gains a powerful self ATK buff for 5 seconds.
-
Deals Burst Skill damage based on final ATK to all enemies.
-
In Stance Mode: Deals additional damage based on final ATK.
-
In Engage Mode: Deals additional True Damage based on final ATK.
Skill Priority for Sin: Swift Bunny
Burst Skill > Skill 2 > Skill 1
-
Burst Skill: Max first (Level 10). This is her primary AoE nuke and major self-buff enabler.
-
Skill 2: Upgrade this to Level 7-10. Critical for mode-specific damage conversion and weapon swap power.
-
Skill 1: Upgrade this to Level 4-7 initially. Helps improve ATK uptime, full-charge multipliers, and mode switching reliability.
Best Overload Gear Lines for Sin: Swift Bunny
It's effective to prioritize Overload lines that increase her damage and help her maintain Full Charge, switch between modes smoothly, and stay active during her Swift Carrot window for the best Goddess of Victory: Nikke Sin: Swift Bunny build.
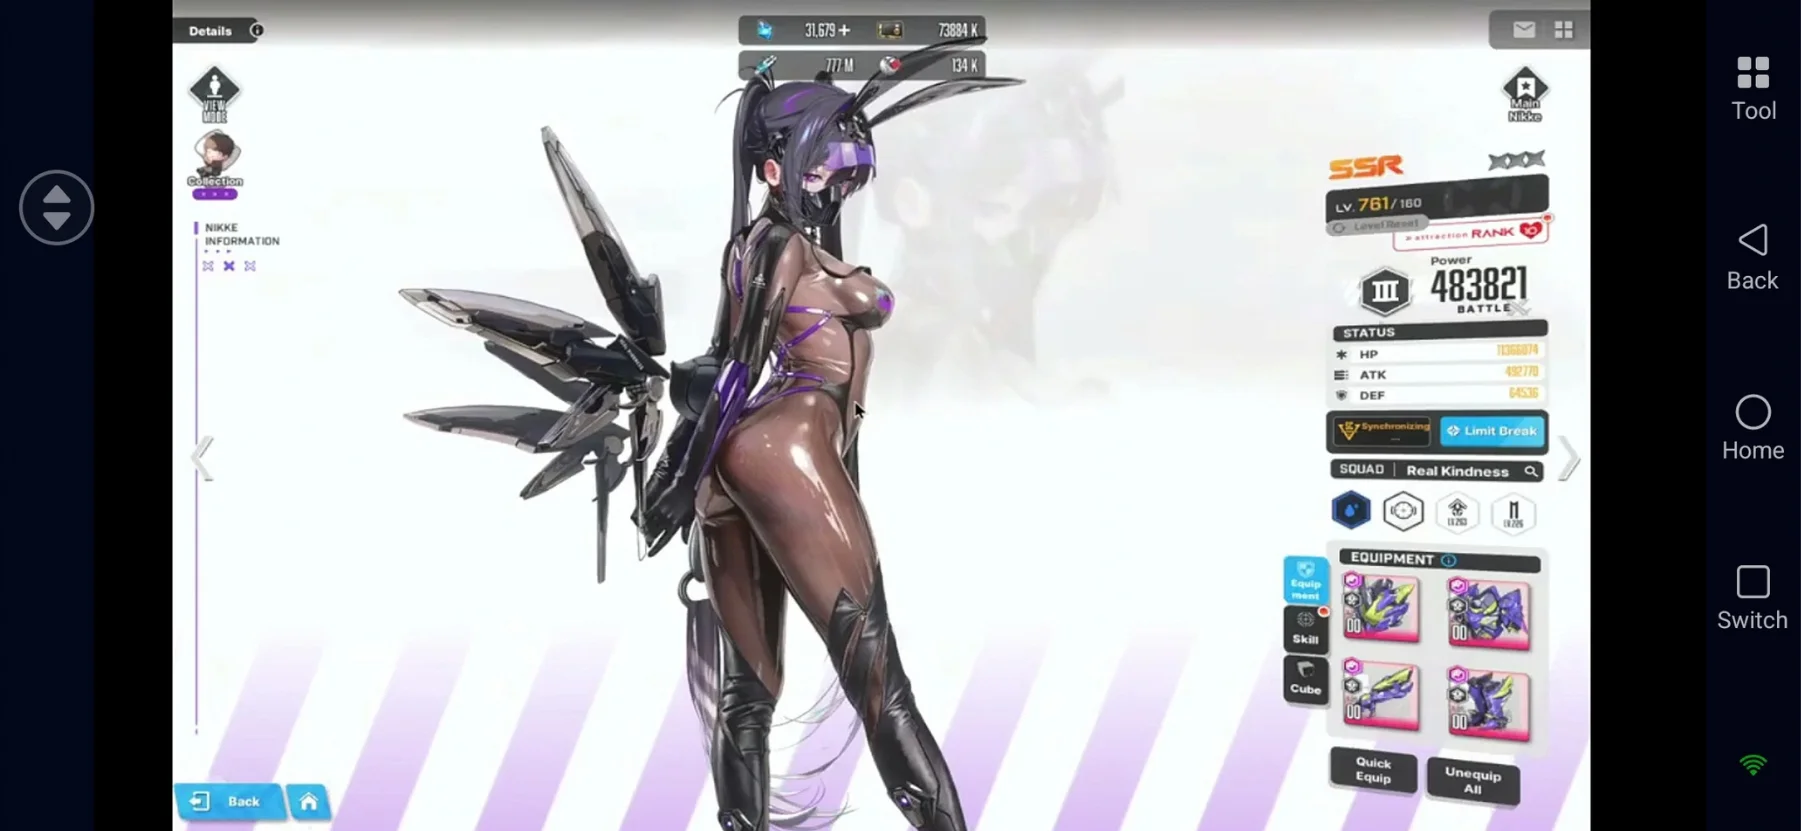
Ideal Target: 4× Elemental Damage (Water) + 4× ATK + 1–2× Max Ammo
These are the main lines to aim for. Elemental Damage and ATK increase her overall damage in both Stance and Engage Modes.
And overall, keep an eye on the below Sin: Swift Bunny stats for Overload gear line priority:
-
Elemental Damage & ATK – Highest priority for increasing her overall damage. Aim for 4 of each.
-
Max Ammo – 1–2 lines are ideal for smoother ammo management and fewer reloads.
-
Charge Speed – Helps her reach Full Charge faster and switch modes more smoothly. (Critical-Oriented Setup)
-
Crit Damage – Strong filler, especially if you frequently stay in Stance Mode. (Critical-Oriented Setup)
-
Charge Damage – A useful filler option when you do not get the higher-priority lines. (Critical-Oriented Setup)
Recommended Sin: Swift Bunny Harmony Cube
If you're focusing on the best Goddess of Victory: Nikke Sin: Swift Bunny build, it's essential to choose the perfect Harmony Cube that improves her Elemental Damage, ATK, ammo uptime, and offensive buffs to maximize her overall damage output.
Below are recommended Harmony Cubes for the Sin: Swift Bunny best builds you can follow:
|
Harmony Cube |
Why It Is Recommended |
|
Resilience
|
Resilience is the best Sin: Swift Bunny harmony cube for most players. It improves Reload Speed, reducing downtime from her low-ammo Sniper Rifle. It helps her attack more consistently and maintain full-charge shots while switching between Stance and Engage. |
|
Bastion
|
Strong alternative if you do not have the Resilience. It boosts ammo efficiency, letting her attack for longer before reloading. This works well with her full-charge focused playstyle. |
|
Destruction
|
Situational option when enemies have exposed cores. It increases core damage, which works well with her Sniper Rifle’s core damage bonus. |



Sin: Swift Bunny Best Team Compositions
Goddess of Victory: Nikke Sin: Swift Bunny is a powerful Burst III Water main DPS with flexible gameplay. She deals high damage through strong self-buffs, mode flexibility, and AoE Burst potential. She especially shines in Water-focused or True Damage team setups and shares Bunny Mode with Guilty: Mighty Bunny.


 AFK Anywhere, Progress Anytime

True-Damage Water Solo Raid Team
This high-damage Solo Raid team focuses on Sin: Swift Bunny’s True Damage potential in Engage Mode. For this team Liter provides a strong ATK buff and cooldown reduction, while Takina increases True Damage. Flora and Guilty: Mighty Bunny further improve team synergy and overall DPS. This powerful combination makes this setup useful against bosses with high DEF.
|
Position |
Team Member |
How They Help |
|
Burst I |
Liter
|
Provides a strong ATK buff and CDR |
|
Burst II |
Takina
|
Amplifies True Damage |
|
Burst III |
Sin: Swift Bunny
|
Main DPS (Engage Mode) |
|
Flex |
Flora (Treasure)
|
Provides strong support and True Damage synergy |
|
Flex |
Guilty: Mighty Bunny
|
Provides Bunny Mode synergy and additional DPS |





Sin: Swift Bunny Crit-Focused Team
This Sin: Swift Bunny team takes advantage of Sin: Swift Bunny’s strong Critical Rate and Critical Damage in Stance Mode for fast wave clearing and solid multi-target damage. In this team, Volume and Ade: Agent Bunny provide strong ATK and Attack Damage buffs, while Flora and Crown provide team buffs and ammo sustain. With these synergies, this team is helpful for Campaign stages and wave-heavy content easier to clear.
|
Position |
Team Member |
How They Help |
|
Burst I |
Volume
|
Provides ATK and Crit support |
|
Burst II |
Ade: Agent Bunny
|
Provides a strong Attack Damage buff |
|
Burst III |
Sin: Swift Bunny
|
Main DPS (Stance Mode for Crit) |
|
Flex |
Flora
|
Provides team buffs and synergy |
|
Flex |
Crown
|
Provides ammo sustain and additional support |



Sin: Swift Bunny Playstyle and Tips
Sin: Swift Bunny gameplay revolves around switching between two modes. Learning what each mode does and when to switch is the key to playing her effectively. With the right timing and switching between modes for the suitable fight, she can be a reliable main DPS for waves, bosses, and most content.

Playstyle Tips:
-
Start the battle in Stance Mode for Critical damage. Hold a full charge for about 1 second to switch to Engage Mode when you need True Damage against tanky enemies or bosses.
-
Allies with Bunny Modes, such as Guilty: Mighty Bunny, will automatically switch modes with her, so coordinate your team around this mechanic.
-
Full-charge shots outside of Burst provide temporary damage boosts, so try to land them often to maintain higher DPS.
-
Use her Burst for strong screen-clearing damage and the temporary fast-charge weapon.
-
Keep her ammo and reload speed high so she can keep firing and switching modes without long pauses.
Is Sin: Swift Bunny Worth Pulling?
While you're thinking about a pull advice for the new Bunny, Sin: Swift Bunny, the answer is Yes. Sin: Swift Bunny is a highly recommended pull for most Commanders. She is a flexible Water Burst III DPS who can switch between Critical damage (Stance Mode) and True Damage (Engage Mode). This makes her strong in many situations. She also has a powerful multi-target Burst, solid self-buffs, and good performance in campaigns, raids, deficit stages, towers, and PvP.

She works very well on her own, but becomes even better when paired with her partner Guilty: Mighty Bunny. The two share mode switching and form a strong Water damage duo that can handle both waves and bosses effectively.
Why she is worth pulling:
-
Flexible mode switching for Critical or True Damage
-
Strong multi-target Burst that clears waves and hits hard on bosses
-
Good energy generation as a Sniper Rifle user
-
Solid performance even with moderate investment
-
Excellent synergy with Guilty: Mighty Bunny and common supports like Liter, Volume, Takina, or Flora (Treasure)
Conclusion
And that's it, Commanders! It's the perfect time to obtain and build Sin: Swift Bunny, the flexible Water DPS who can adapt to different battles with her two modes. You can use the recommendations from this Goddess of Victory: Nikke Sin: Swift Bunny build guide to choose her Harmony Cube, Overload lines, and the best team setups to help her shine in battle. For more resources, OSLink's Multi-Instance features like Multi-Instance feature and AFK features lets you farm across multiple accounts while leveling Sin: Swift Bunny more easily.
 Download